Install and connect a Compare agent.
Download Gifrost Database Compare Agent, install it close to the source database, and add it to Agent Store. The guided process finishes by checking that the agent is connected and ready to accept work from Compare 2.0.
Before you begin
Install the agent on a computer or server located close to the source database. For Docker, use a server that can access both the database and Kafka.
Linux, Windows, and macOS Download the selected installer and complete the installation form before adding the agent to Agent Store.
Docker Download the package and use the command provided in the additional Run step.
Download the agent
1. Select the system
Choose Docker, Linux, Windows, or macOS.
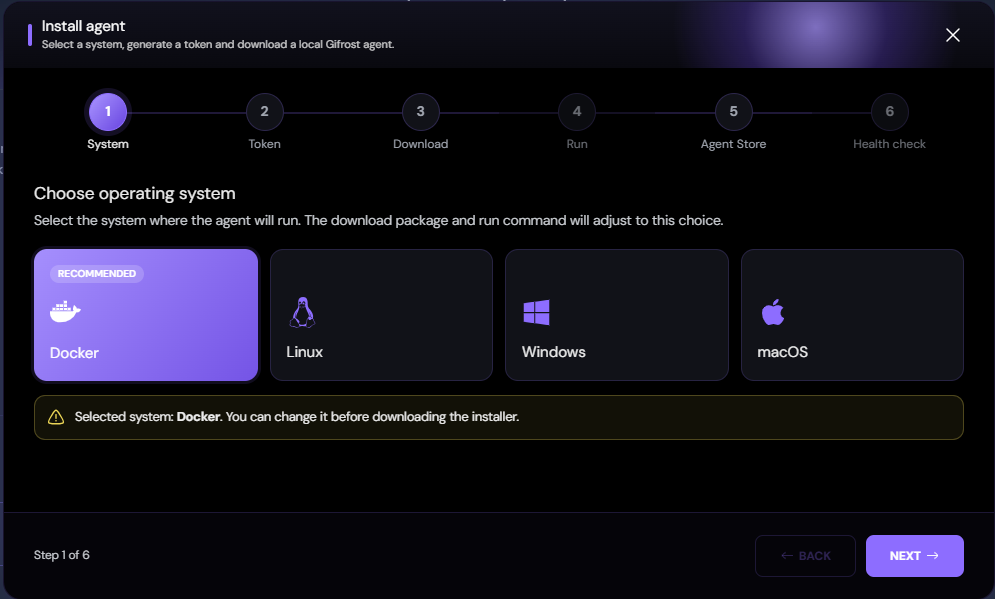
Select the operating system on which the agent will run.
2. Generate the token
Select how long the token should remain valid: 7, 30, 90, or 365 days. Generate the token and copy it.
Compare automatically uses this token when the agent is added to Agent Store.
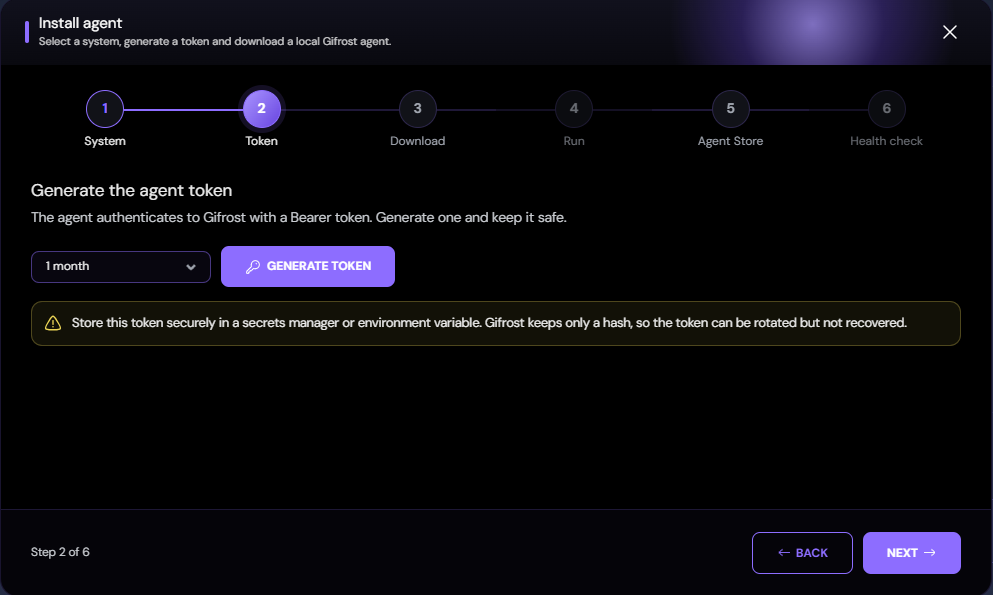
Choose the token validity period and generate the agent token.
3. Select and download the version
When the Download step opens, Compare lists the versions available for the selected system. Each option shows the version, release date, and file name.
Select the required version and click Download.
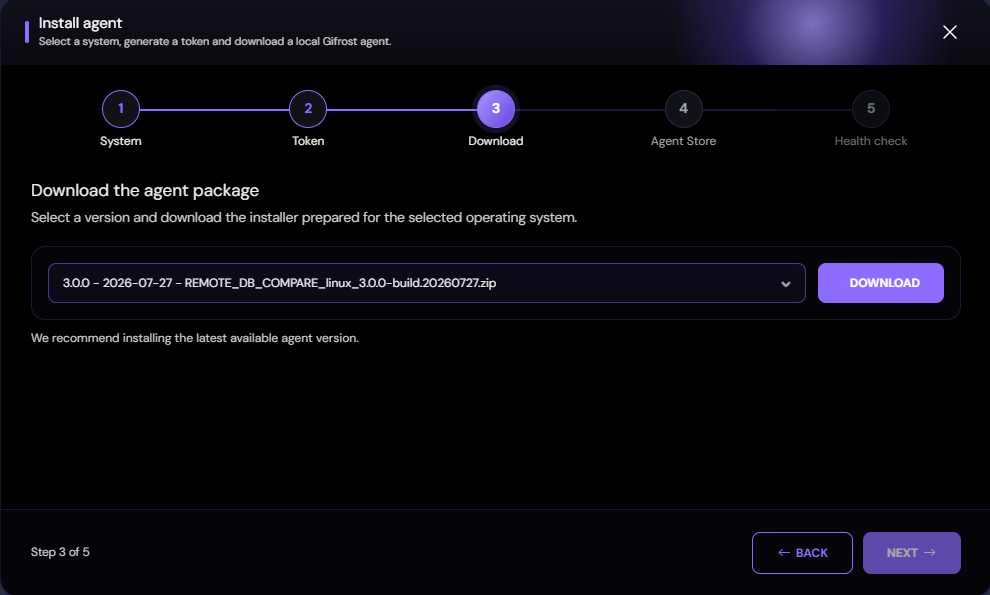
Select an available agent version and download its installation package.
4. Start the agent
Docker displays an additional Run step. Copy the command provided by Compare and run it on the server that has access to the database and Kafka.
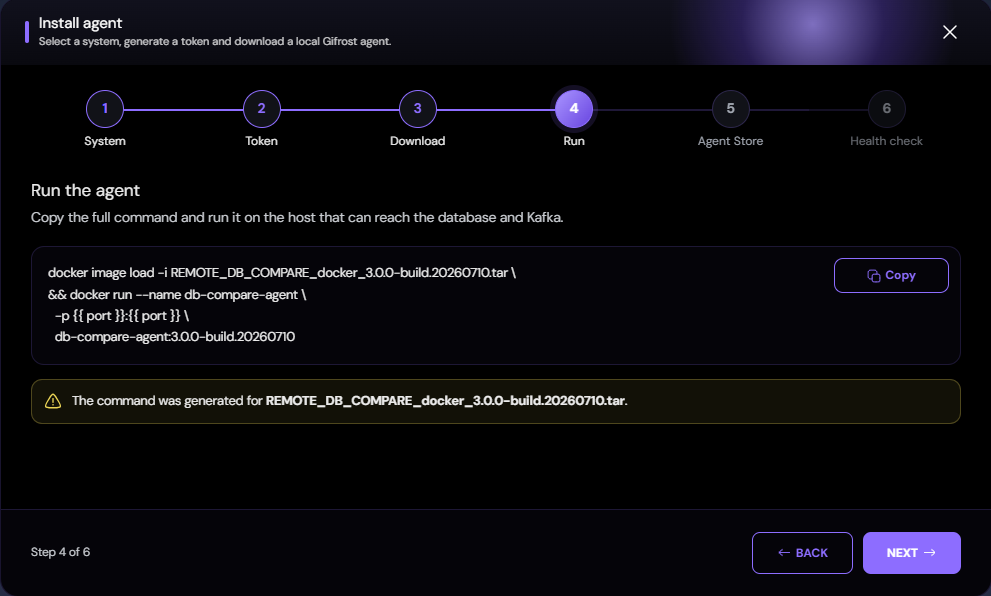
Copy and run the command prepared for the downloaded Docker package.
5. Enter the agent details
Continue to the Agent Store step and complete:
- Agent name;
- Related credential name;
- Host;
- Port.
Click Add agent.
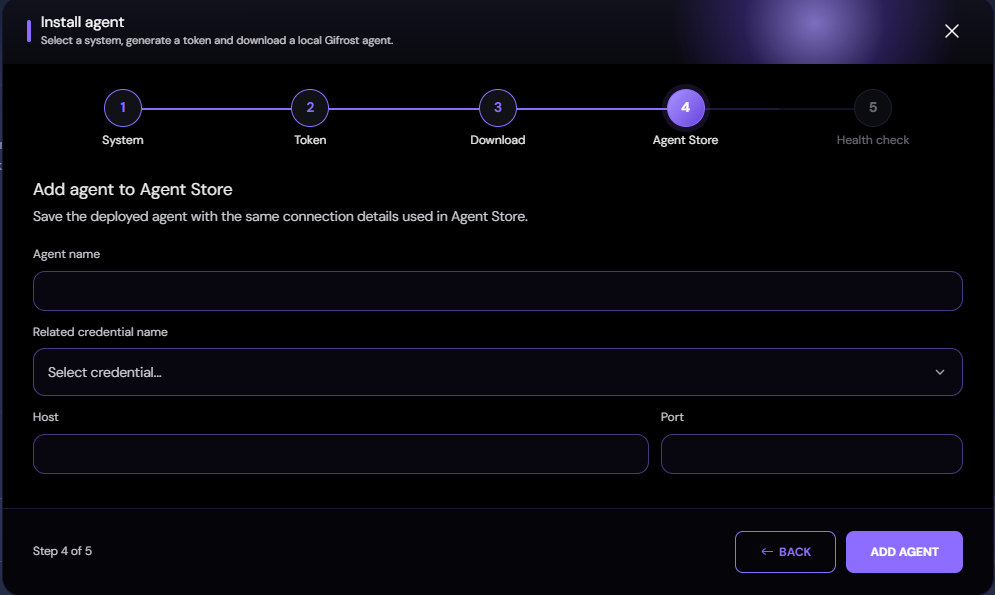
Enter the agent name, related credential, host, and port.
6. Confirm that the agent is ready
Compare automatically checks whether it can connect to the agent.
A green check confirms that the agent is connected and ready to accept work.
A red X and the full error message explain that the check failed. Select Retry health check to run the same check again.
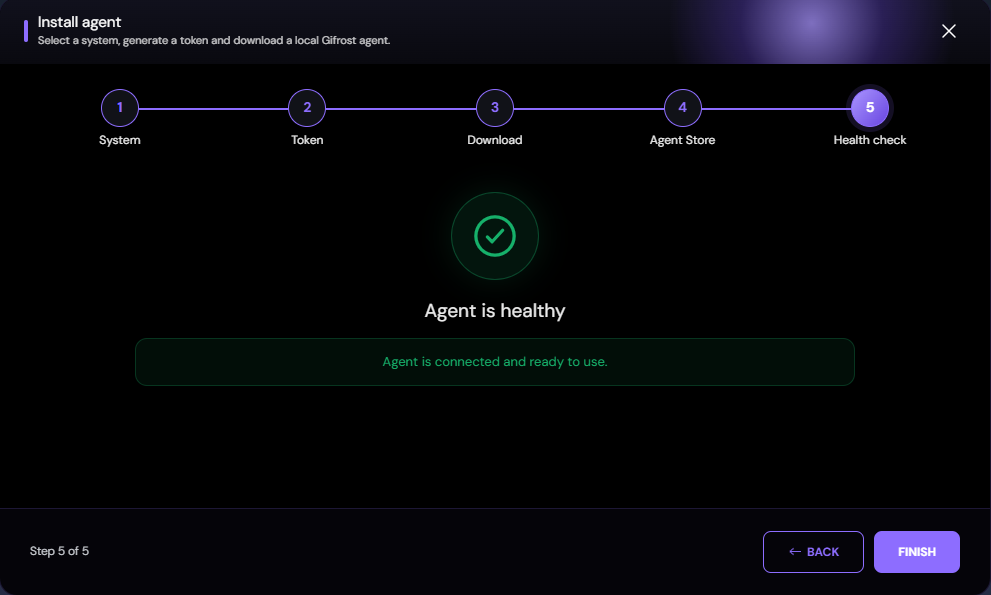
A successful health check confirms that the agent is connected and ready to use.
Run the installer
The installer steps below apply to Linux, Windows, and macOS. Docker users do not need to complete this section.
1. Open Gifrost Database Compare Agent
Launch the downloaded installer.
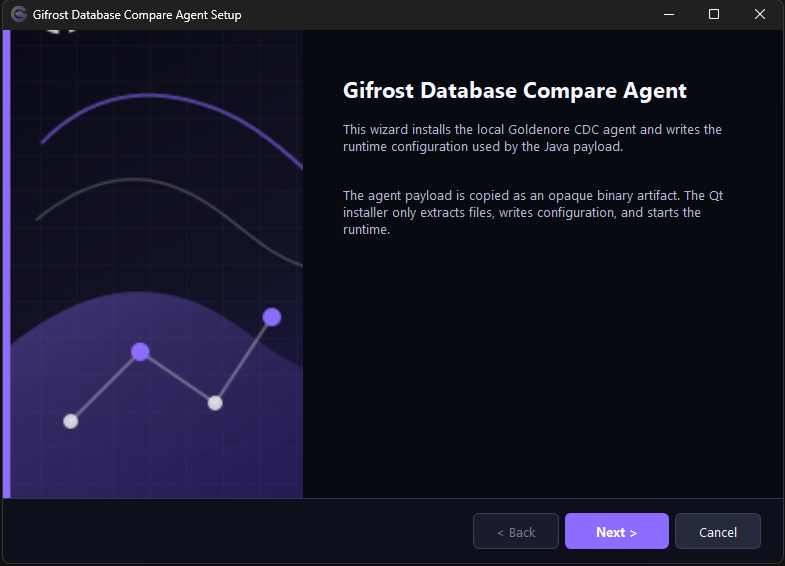
Open the Gifrost Database Compare Agent installer.
2. Choose the installation location
Select the directory where the agent, its configuration, and its logs will be stored.
If an agent already exists in that directory, the installer automatically switches to update mode. It recognizes the previous version and loads the existing values, so the product does not need to be configured again.
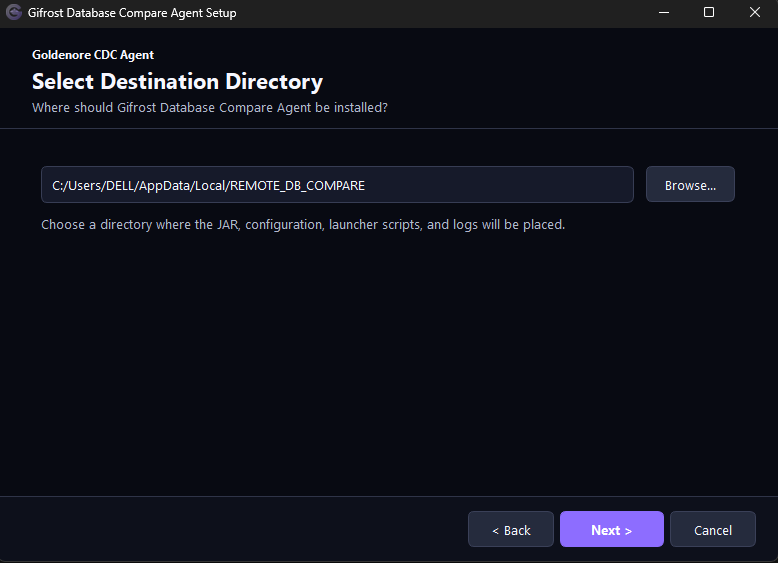
Select the directory in which the agent will be installed.
3. Confirm the operating settings
Provide the three values used during normal agent operation:
- Port — 6667 by default. This is the point through which Compare 2.0 contacts the agent.
- File results directory — the location used when a task returns its result as files.
- Streaming results directory — a temporary location for results prepared for collection by Compare 2.0.
During an update, the form is filled with the existing values.
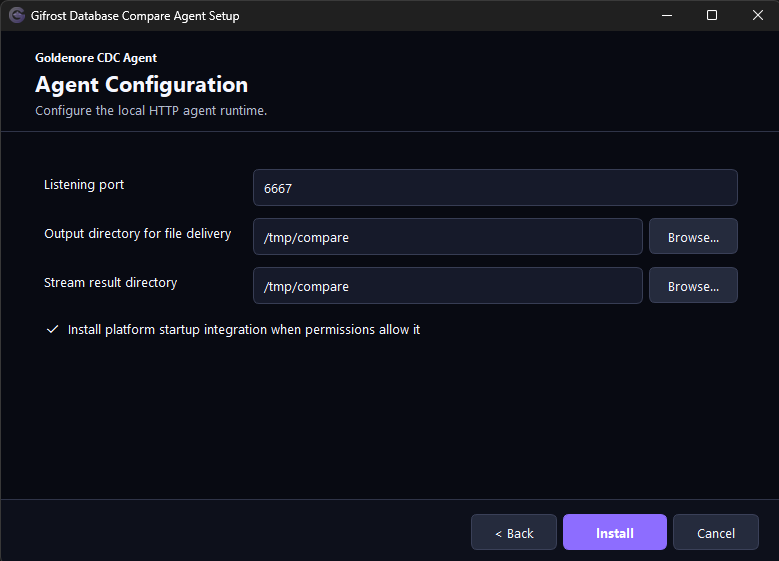
Confirm the communication port and the file and streaming result directories.
4. Start the installation or update
Select Install for a new agent or Update when an existing installation was detected. The installer completes the process automatically and displays its progress.
The installer prepares the agent's complete working environment and saves its operating settings. During an update, it also preserves the remaining settings that it does not manage directly.
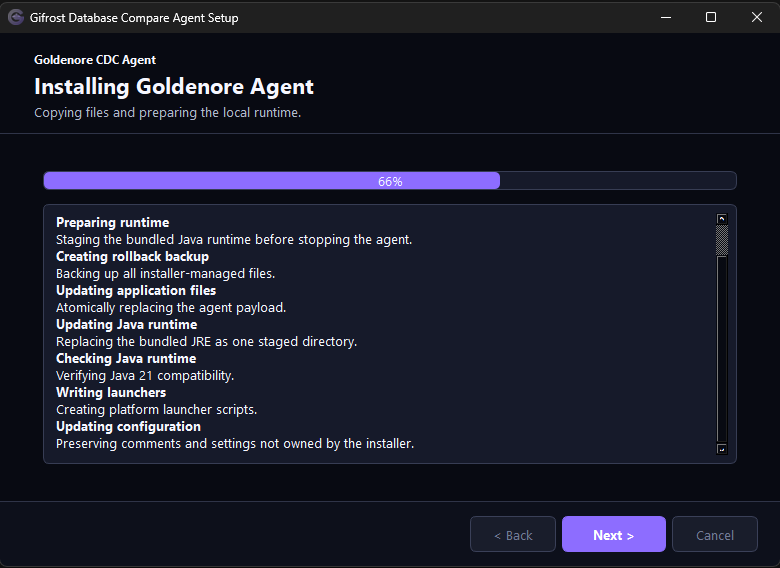
Wait while the installer prepares the agent and its working environment.
The installer does not ask for database sign-in details, Kafka configuration, private keys, or permanent access tokens. Compare 2.0 provides the information required for a specific task only when that task is assigned to the agent.
5. Review the installation result
The final screen shows:
- whether the process succeeded or failed;
- the port in use;
- the address used to check the agent's status;
- an action for running the readiness test again.
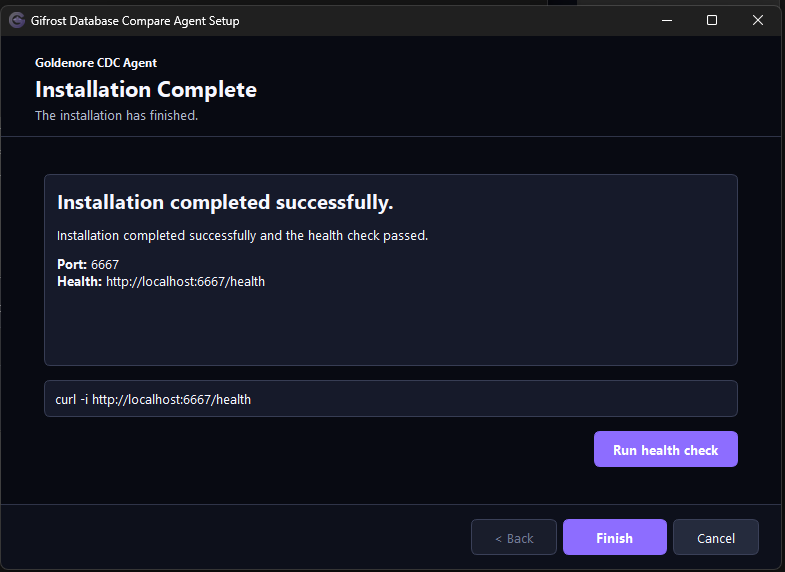
Review the installation result and the available health-check action.