Connector Creation
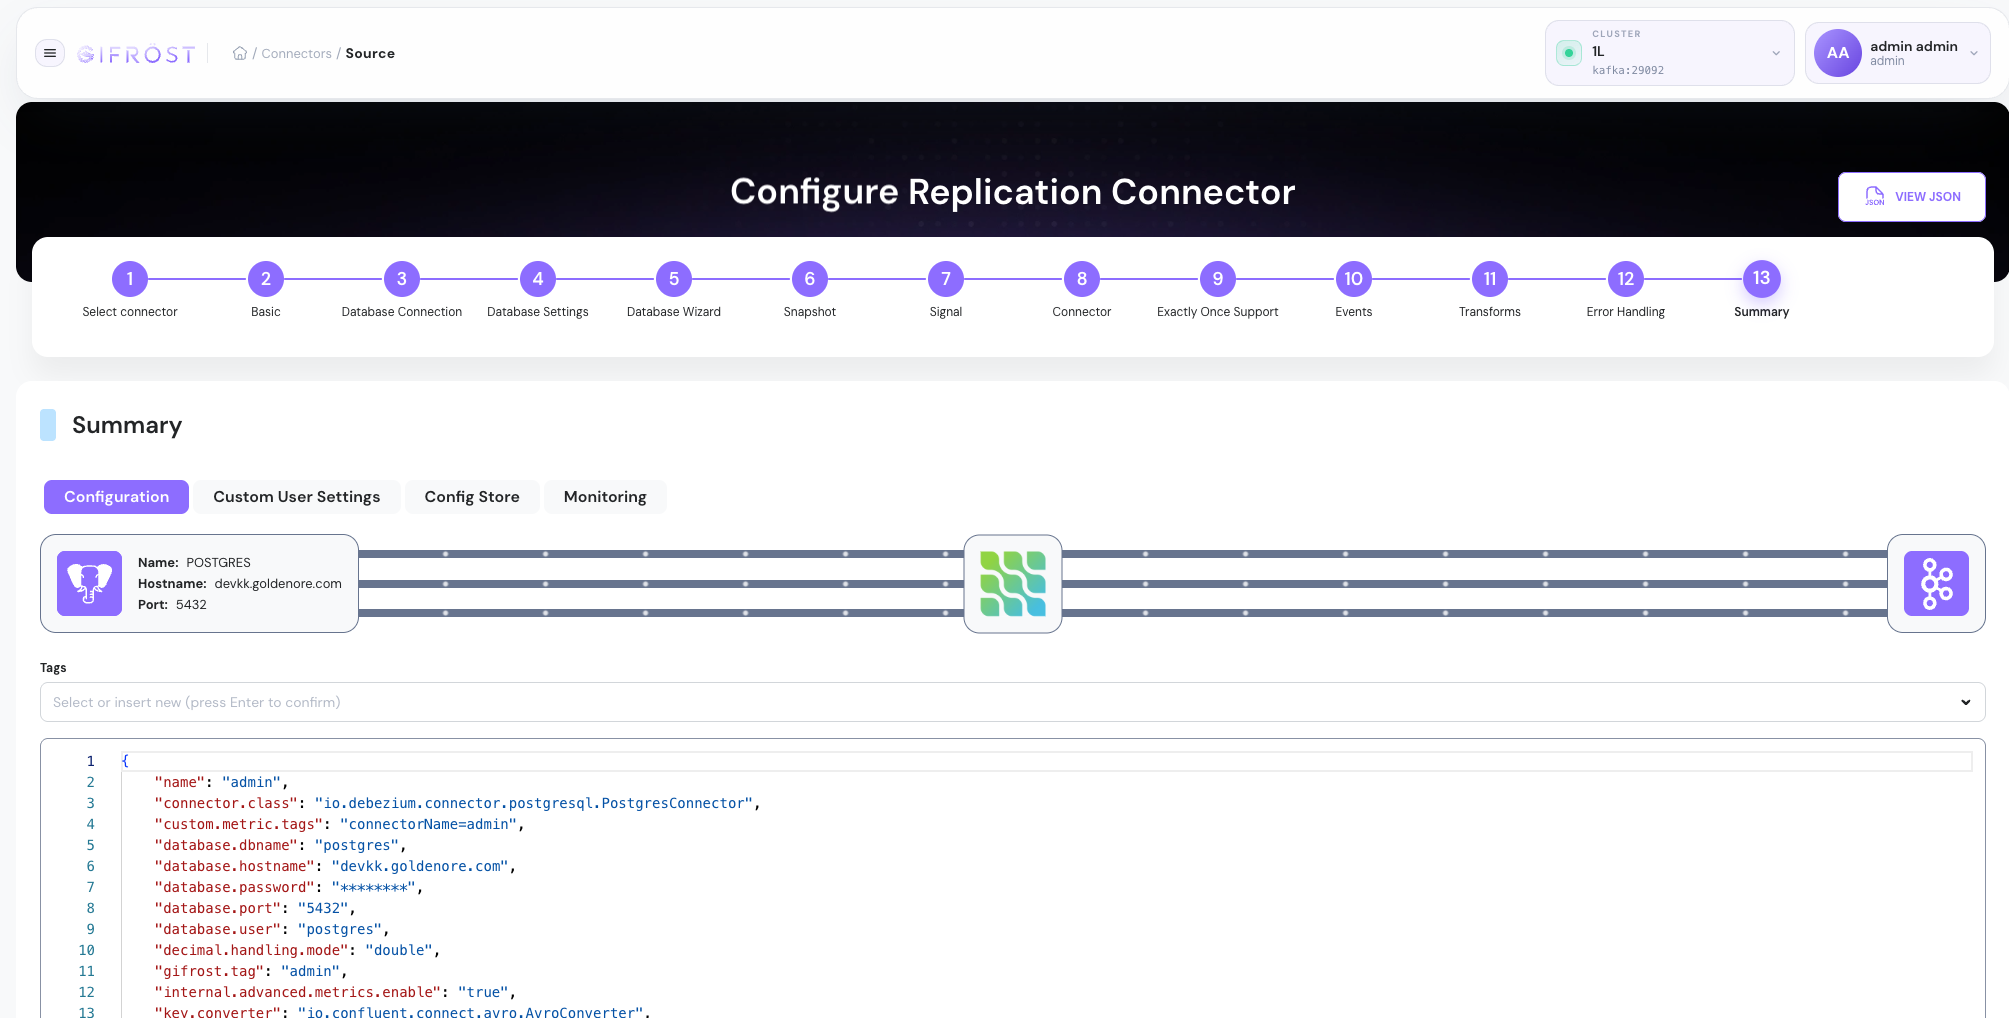
The connector creation wizard guides the user through the complete process of preparing a Kafka Connect replication connector: from selecting the connector type, through database access and replication scope, to advanced runtime options and final configuration review.
The system reads the connector and transform plugins available in Kafka Connect. When a new connector is installed in the Kafka Connect environment, the application can detect it and expose it as another option in the wizard without requiring a separate UI change.
Step 1: Select Connector Type
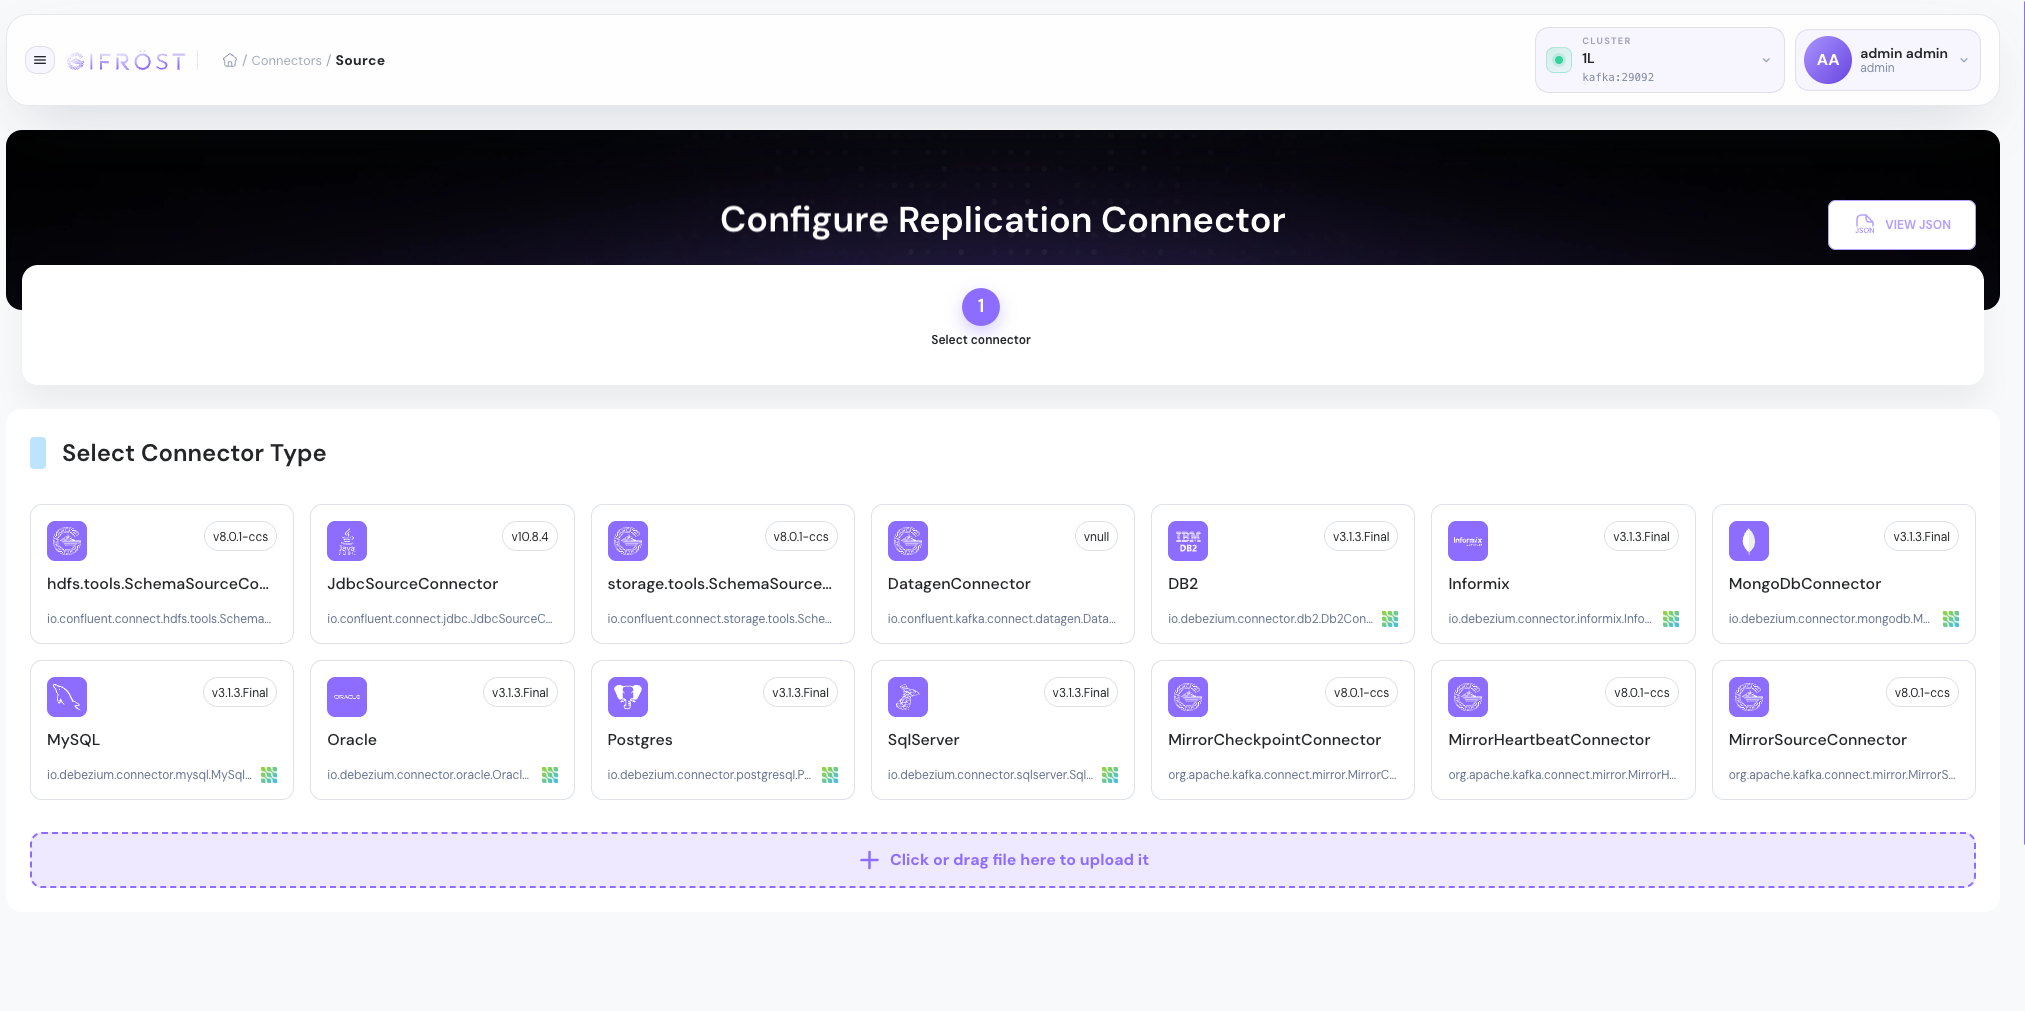
The first step is choosing the connector class that will be used to build the replication pipeline. The list is generated from connectors installed in the selected Kafka Connect cluster and can include both built-in and custom connector plugins.
Each connector card shows the connector name, class and version, so the user can confirm that the expected plugin is available before moving to the next step.
Step 2: Define Basic Parameters
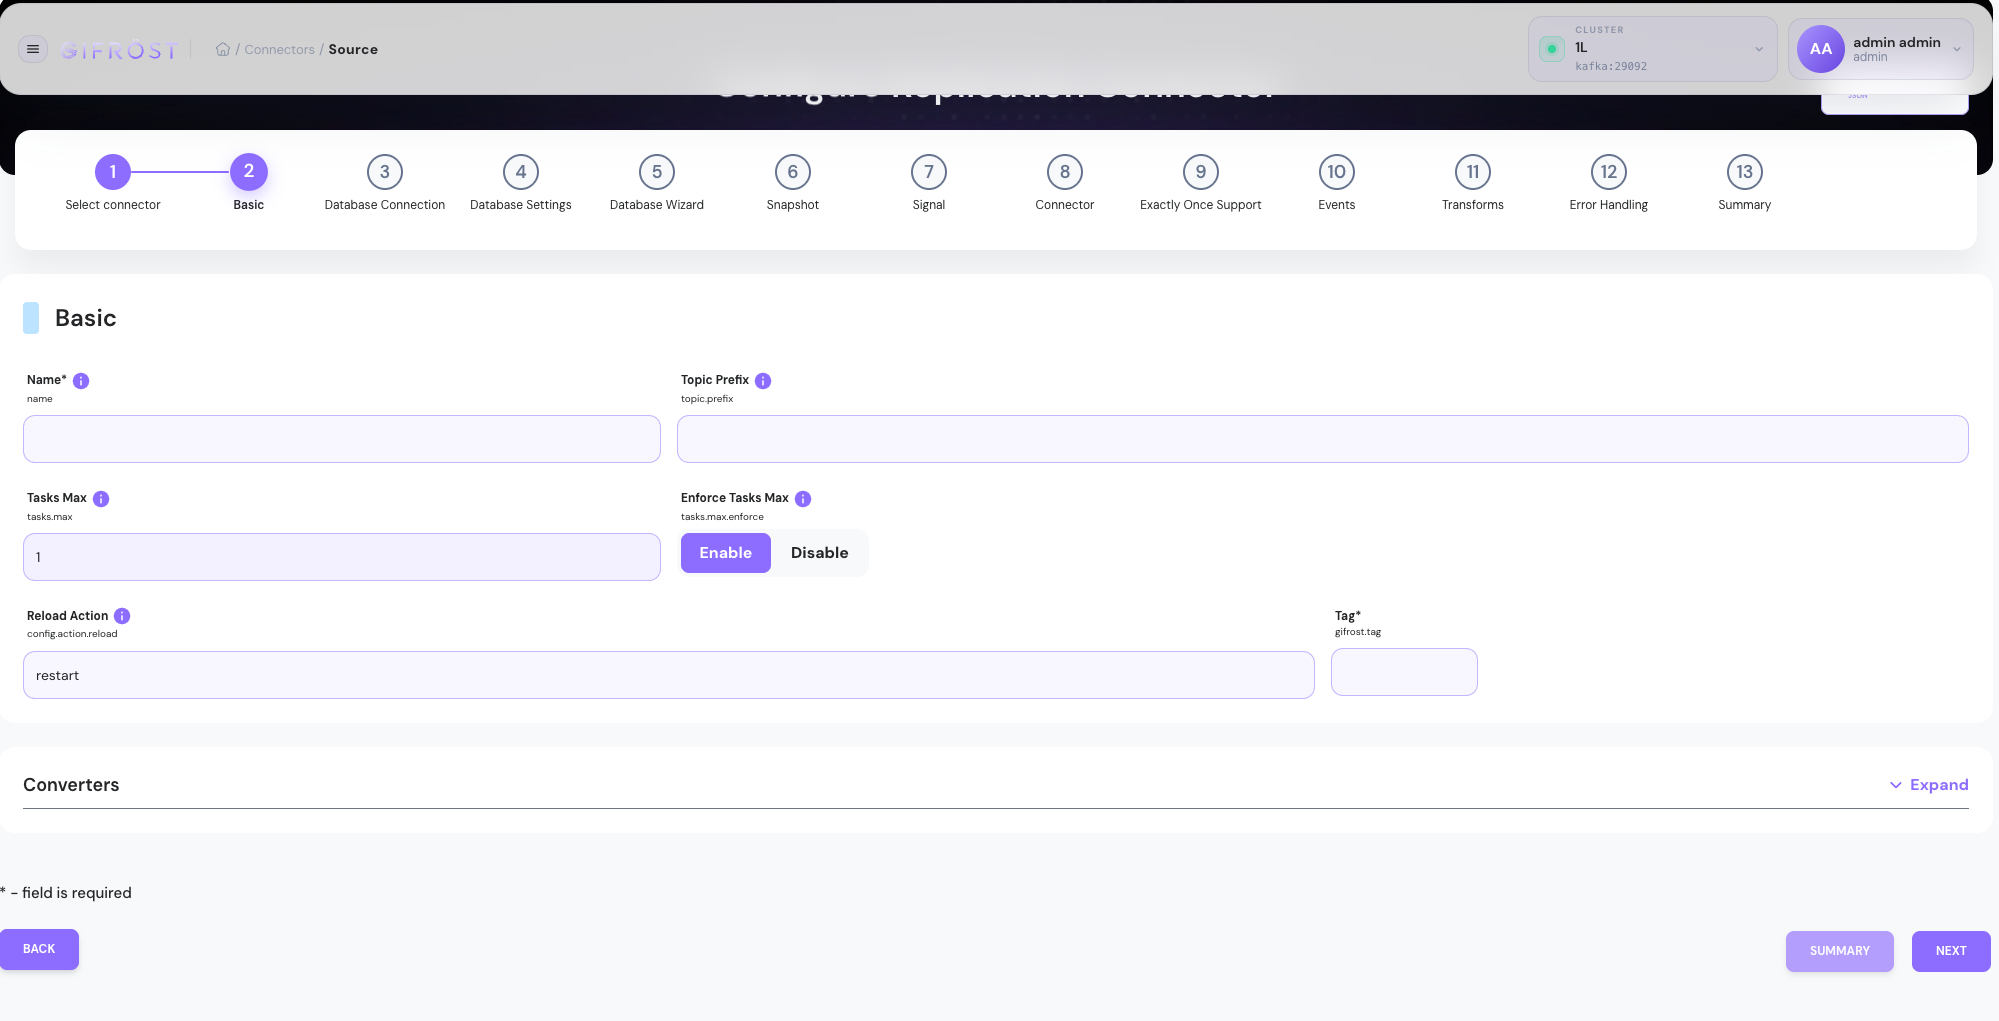
After selecting the connector type, define the required startup parameters. The most important fields are:
- Name - the unique connector name in Kafka Connect.
- Topic Prefix - the prefix used when creating Kafka topics for replicated data.
- Tasks Max - the maximum number of connector tasks.
- Tag - the GIFROST tag used to group and identify the connector.
- Converters - serialization settings for keys and values.
These values define how the connector will be identified and how it will publish data into Kafka.
Step 3: Select Database Connection
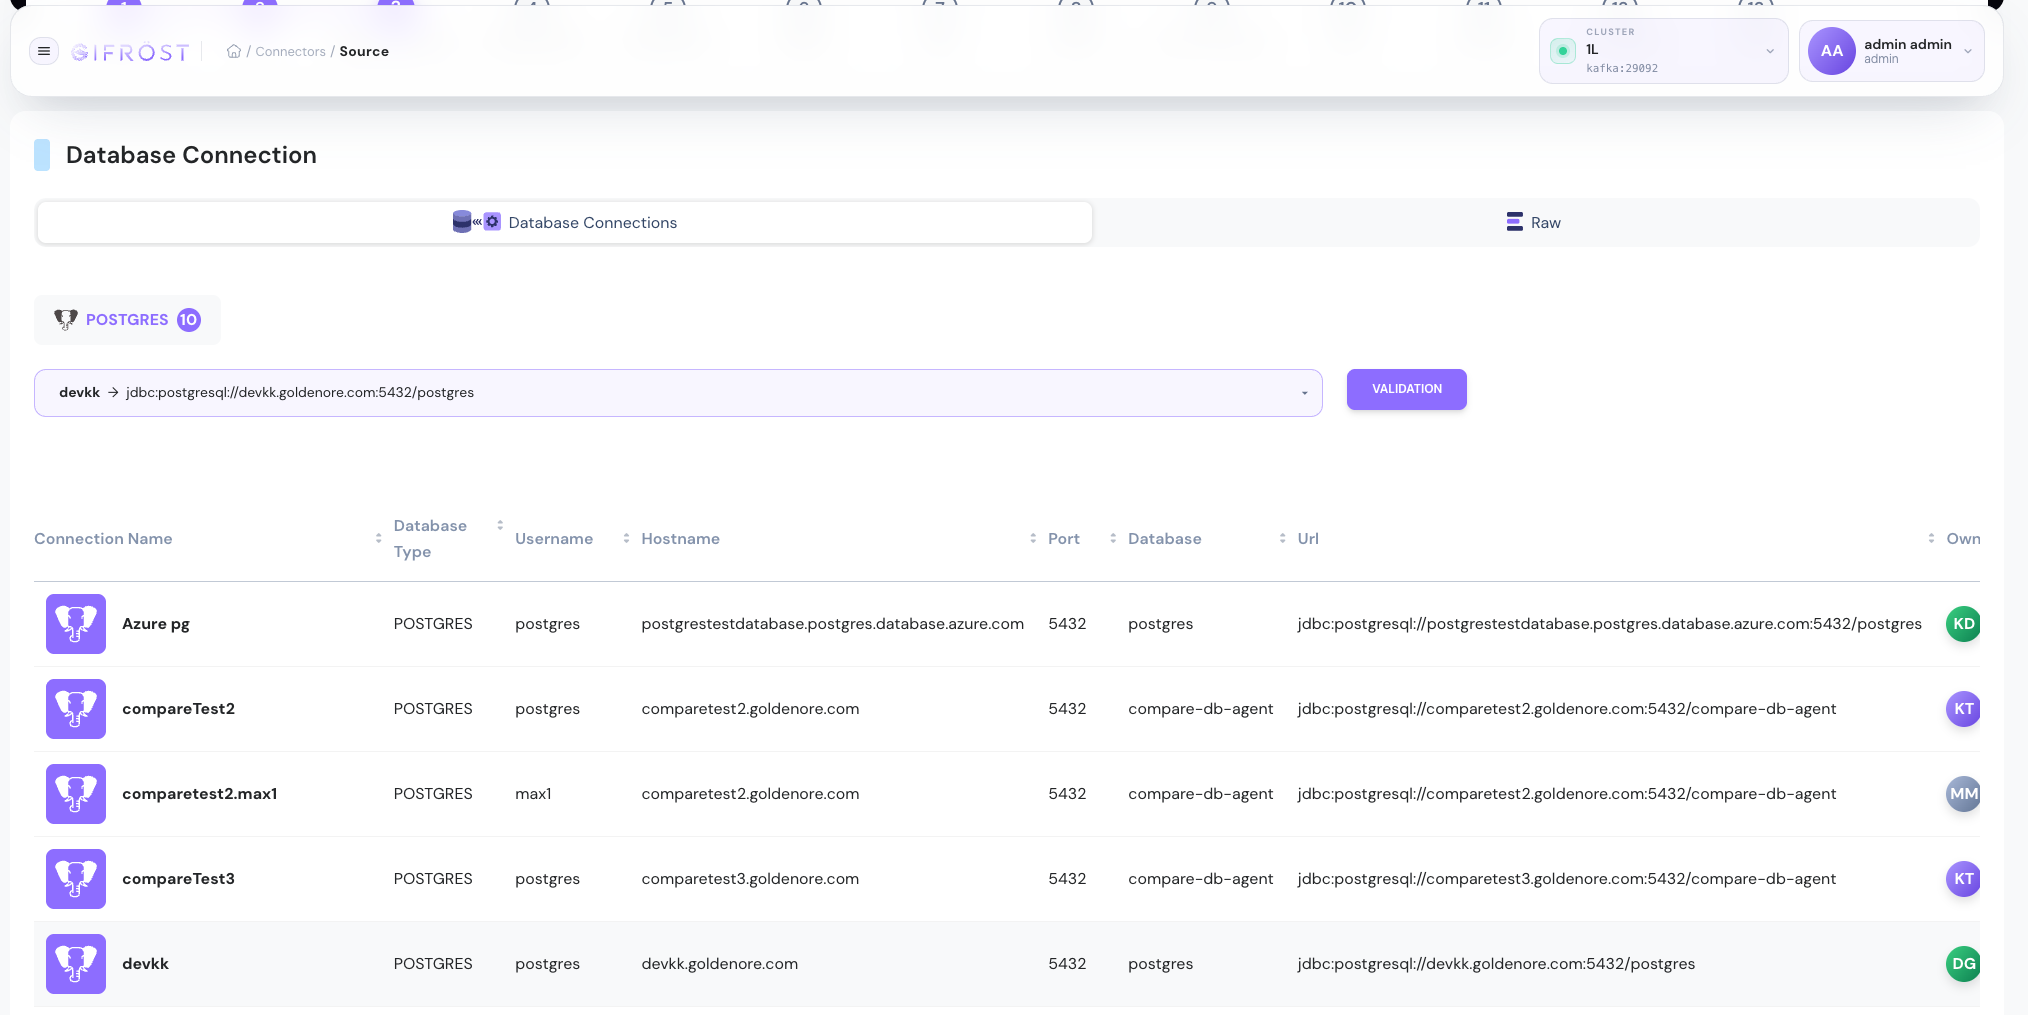
In the database connection step, choose the source database that the connector should read from. The recommended path is to use a saved connection from Database Store, because the connection parameters can be reused and validated before the connector starts.
If needed, advanced users can also define raw connection parameters directly in the connector configuration. Before continuing, validate the selected connection to confirm that the database is reachable and the credentials are correct.
Step 4: Configure Replication Scope
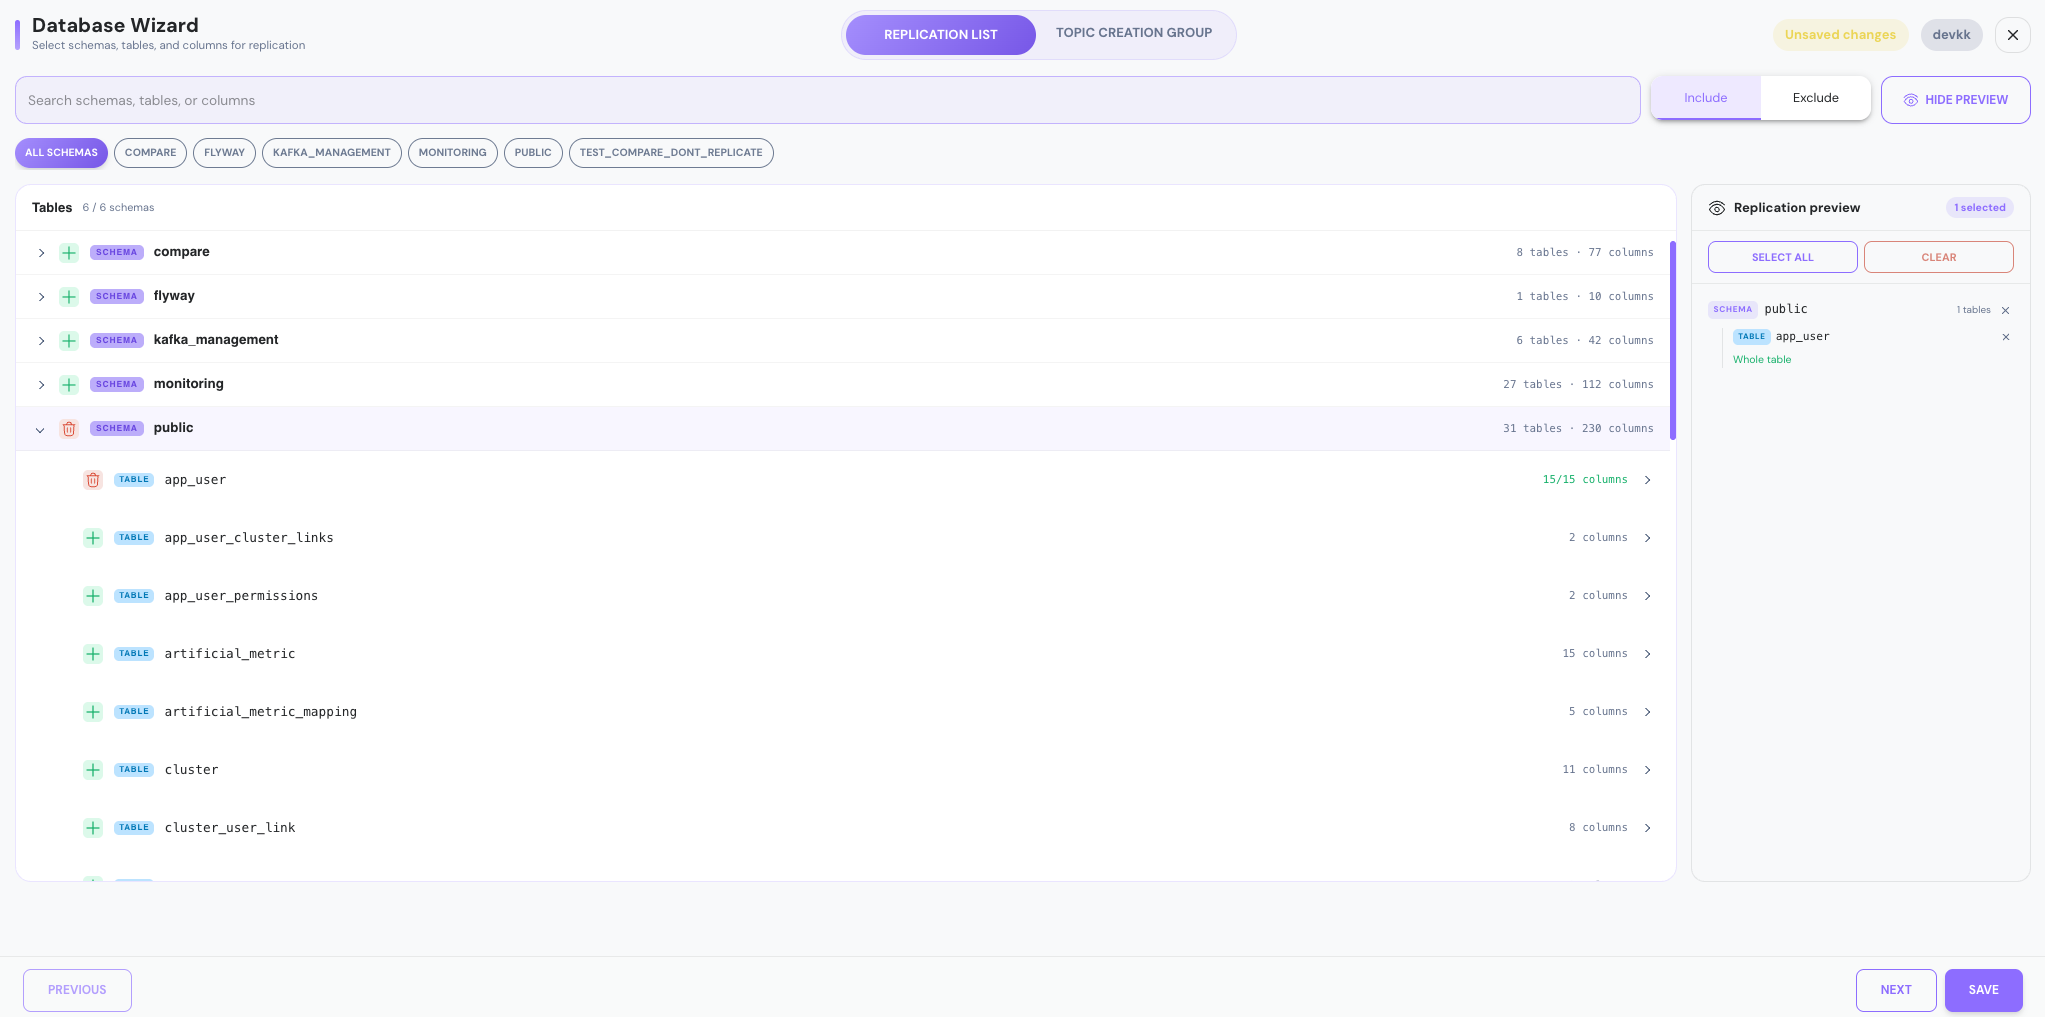
The Database Wizard step defines which schemas, tables and columns should be replicated. The user can select complete schemas, individual tables or selected columns. The wizard then generates the relevant Debezium filter parameters, such as:
schema.include.list/schema.exclude.listtable.include.list/table.exclude.listcolumn.include.list/column.exclude.list
The wizard also shows a replication preview, making it easier to verify the final scope before saving the configuration. For details, see Database Wizard.
Step 5: Configure Advanced Replication Parameters
Between the database connection and final summary, the wizard exposes additional configuration categories. They should be adjusted only when the connector requires behavior different from the default setup.
The most common advanced categories are:
- Database Settings - database-specific connector options.
- Snapshot - initial snapshot behavior and snapshot mode.
- Signal - Debezium signaling configuration.
- Connector - connector-specific runtime parameters.
- Exactly Once Support - settings related to exactly-once processing guarantees.
- Events - event emission options.
- Error Handling - retry, tolerance and dead-letter behavior.
The key rule is to keep the required parameters explicit and leave optional settings unchanged unless the replication scenario needs them.
Step 6: Add Transforms
The Transforms step allows adding Kafka Connect Single Message Transforms. The system detects available transforms from the Kafka Connect environment, including custom transforms installed by the team.
Transforms should be used when records need to be renamed, enriched, filtered, masked or reshaped before they reach the target Kafka topic. For broader context, see Data transformations.
Step 7: Review Summary and Start
The final Summary step shows the generated connector configuration. This is the last place to verify the selected database, connector class, replication scope, transforms, monitoring options and raw JSON payload.
After review, the connector can be saved and started. The summary makes it possible to inspect the exact configuration that will be submitted to Kafka Connect.